Mylio Photos Blog
Mylio Photos Blog
  • Featured
  • Stories
  • Education
  • Reviews
  • Photography
  • How-to
Category:

Education

Apple iPhone 16
EducationFeatured

How to transfer your photos to your new iPhone

by Osiris Indriya September 10, 2024

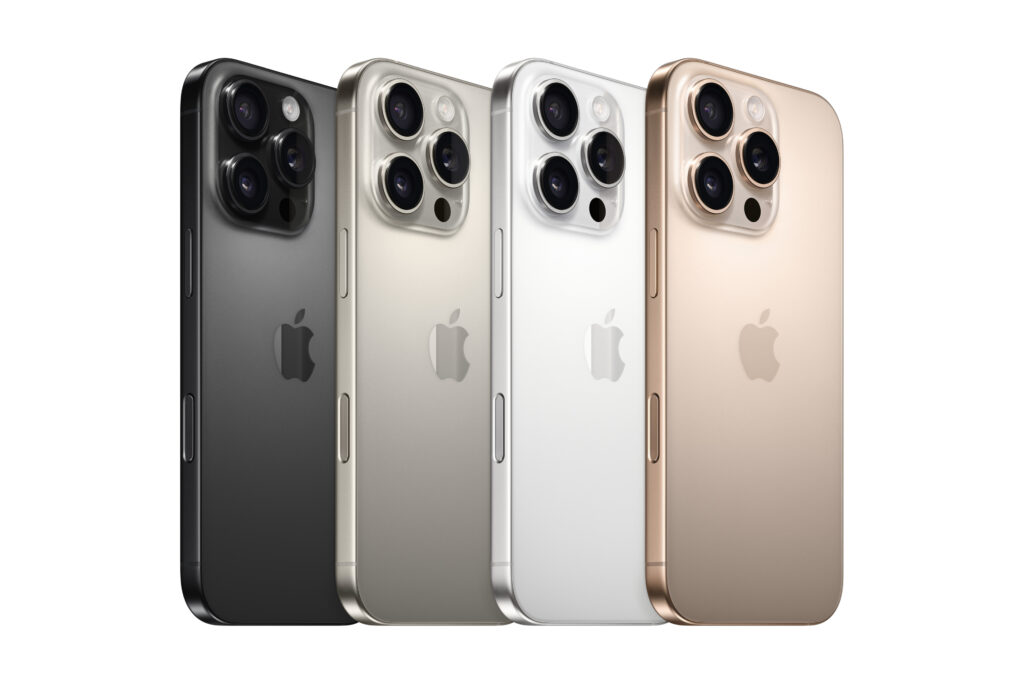
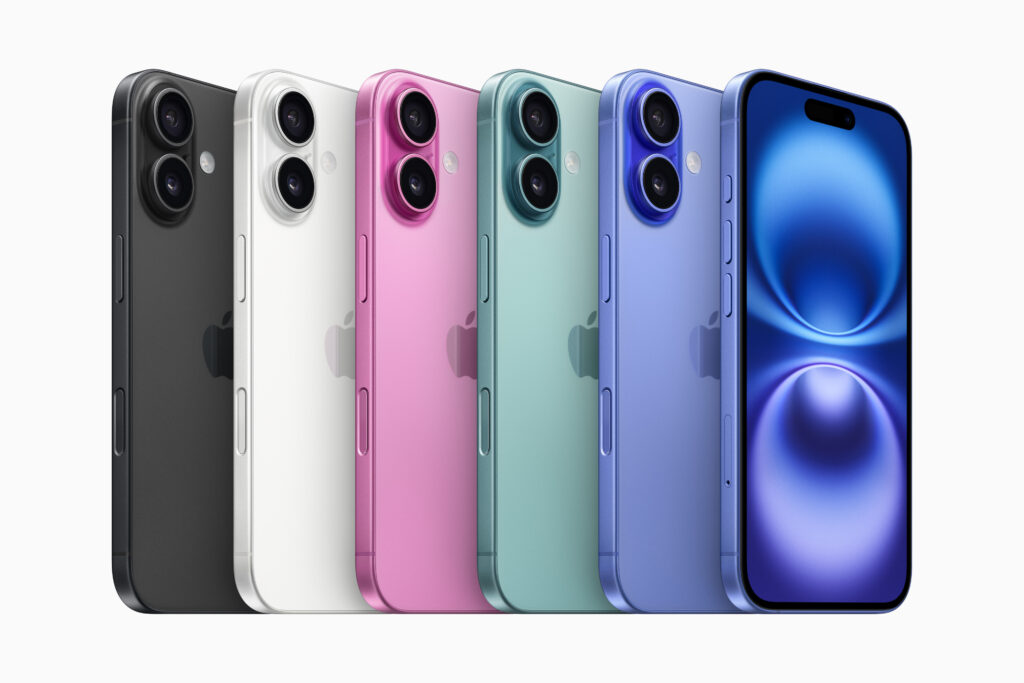
Upgrading to a new iPhone 16 or iPhone 16 Pro?

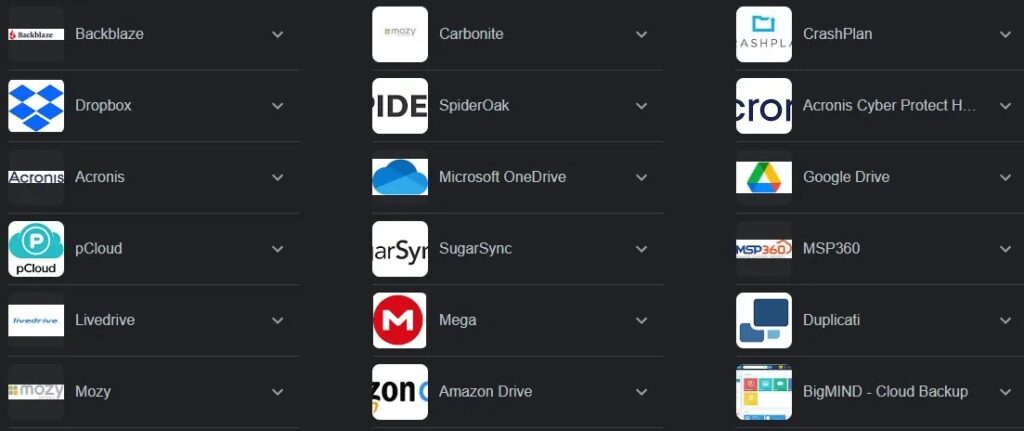
Each September, Apple releases new iPhones with better specs, cameras, and more. If you just got a new iPhone 16, transferring all your essential files from your old iPhone to your new iPhone can take hours and hours using an iCloud Backup.

Here are the steps to transfer photos onto your new iPhone 16 or iPhone 16 Pro with Mylio Photos—fast! The exact process can transfer all your apps and data to a new iPad. Hassle-free. Cloud-free.

Transfer photos to iPhone 16 quickly.

Remove large files from your current iPhone that don’t need to be backed up, like podcasts, movies, TV shows, etc. You can download those later after you move over to the new phone. You can review the largest files on your device by going to Settings > General > Storage.

Using a Windows computer? Start by downloading and installing the latest version of iTunes for Windows.

Don’t forget! — Manually Tansfer High Security Apps & Services

After completing the transfer process below, remember to manually transfer any two-factor authentication (2FA) apps, crypto wallets, or other highly secured apps and data. This wired transfer process will not work for these data types.

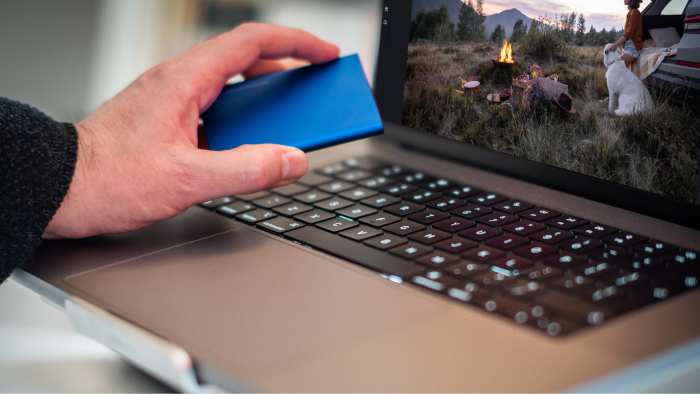
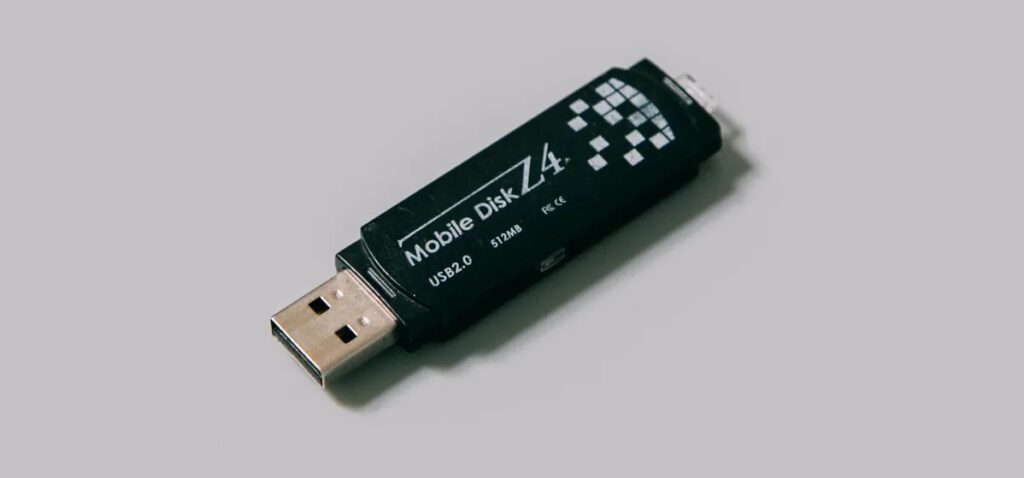
Step 1: Connect your old iPhone to your computer with a USB cable.

Apple iPhone 16 Pro finish lineup
Apple iPhone 16 Pro – Finish Lineup
Apple iPhone 16 – Finish Lineup

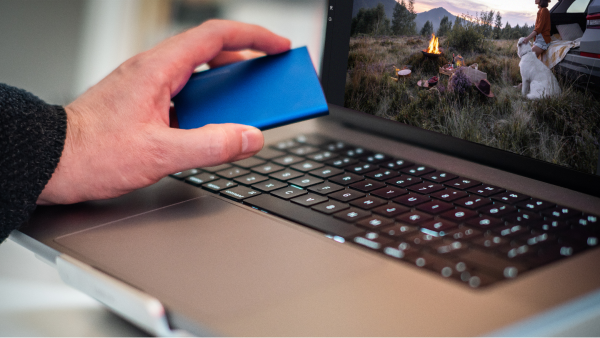
You will need a lightning cable for iPhone 14 lines and older. For best results, connect your old phone directly to your computer using a high-speed cable. Once connected, your old iPhone is listed as a device in the Finder / iTunes.

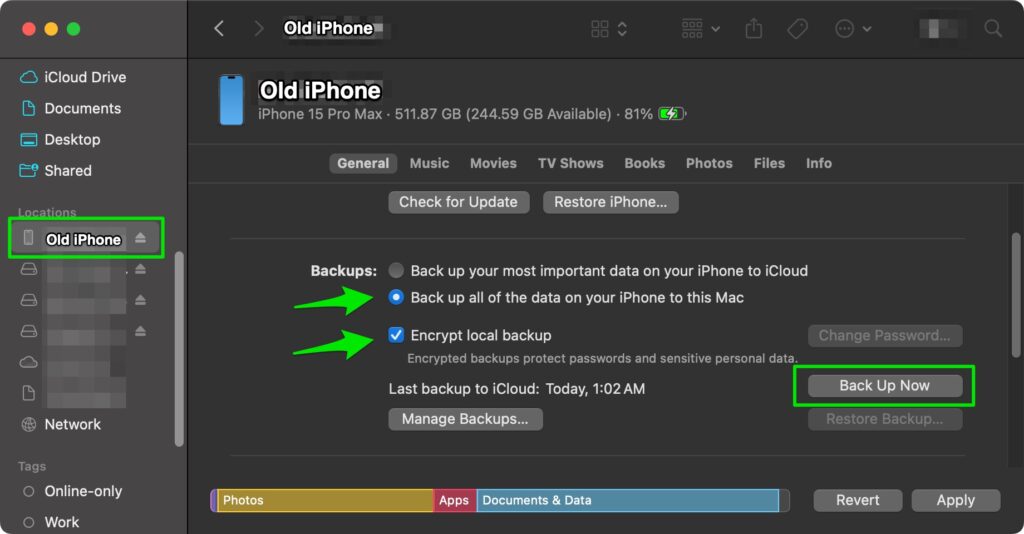
Step 2: Back up your old iPhone to your computer.

  1. Open the old iPhone in the Finder (macOS) or iTunes (Windows).
  2. Select “Back up all of the data on your iPhone…”
  3. Click “Back Up Now” and wait for the backup to complete.
  4. Unlock your old iPhone with your passcode when asked to do so.
  5. Wait for your backup to complete.

SAVE TIME: Encrypt Local Backup

Check the box next to “Encrypt local backup” to protect your passwords and personal data. That will save you the hassle of re-entering all your passwords when you move to your new iPhone after the transfer.

Once the backup of your old iPhone has finished, it is OK to disconnect your old phone from the computer.

Now, move to Step 3 to transfer your photos to your new iPhone.

Step 3: Connect your NEW iPhone 16 to your computer with a USB cable and transfer photos to your new iPhone.

Apple iPhone in titanium finish with USB C port and cable

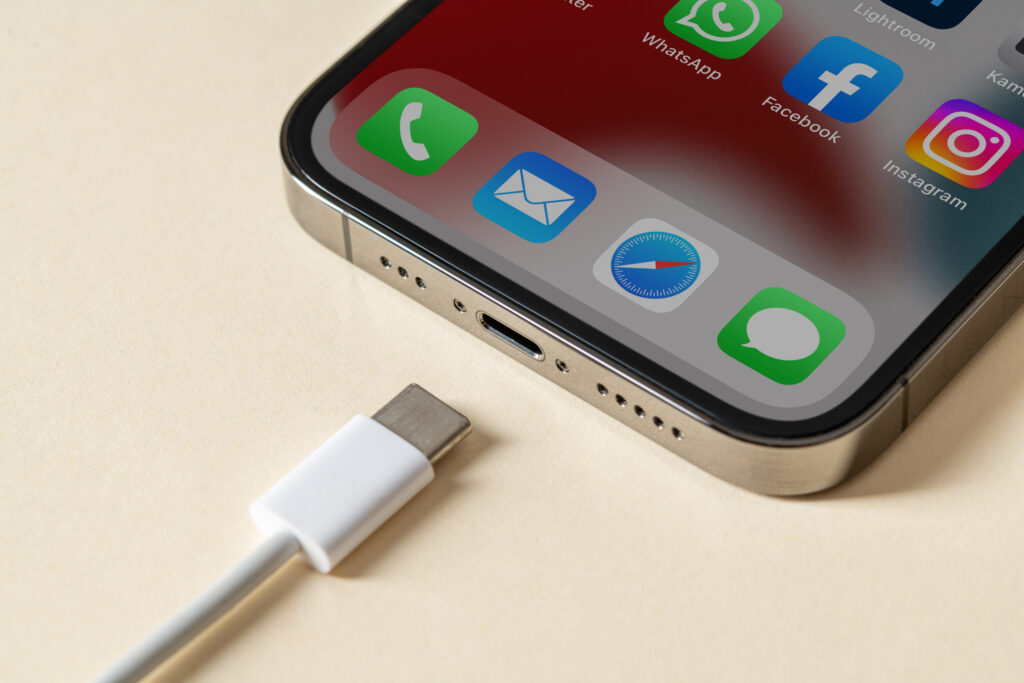
You will need a USB C cable for the iPhone 15 and newer.

For best results, directly connect your new iPhone 16 to your computer using the correct high-speed cable. Once connected, your new iPhone 16 is listed as a device in the Finder / iTunes as in Step 1 above.

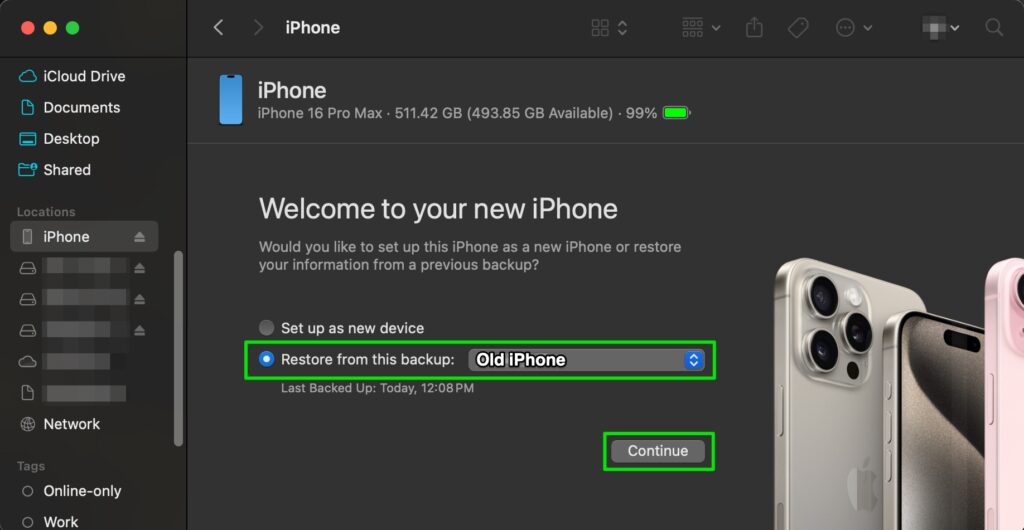
Step 4: Restore your NEW iPhone from the new backup.

  1. Open the new iPhone 16 in the Finder (macOS) or iTunes (Windows).
  2. Select “Restore from this backup“.
  3. Choose the most recent update that you just created.
  4. Click “Continue” and wait for the restore to finish. If asked, enter the password for your encrypted backup.
  5. Follow the prompts on the computer and the new iPhone to ensure the restore can continue.
  6. Keep your iPhone connected by USB. Your phone will restart.
  7. Wait until the restore process has finished on your computer.

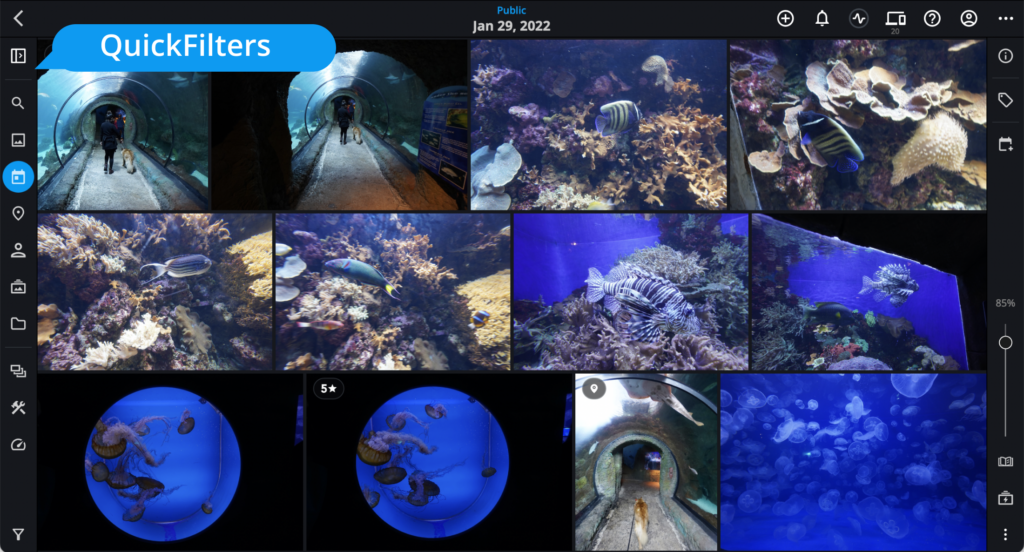
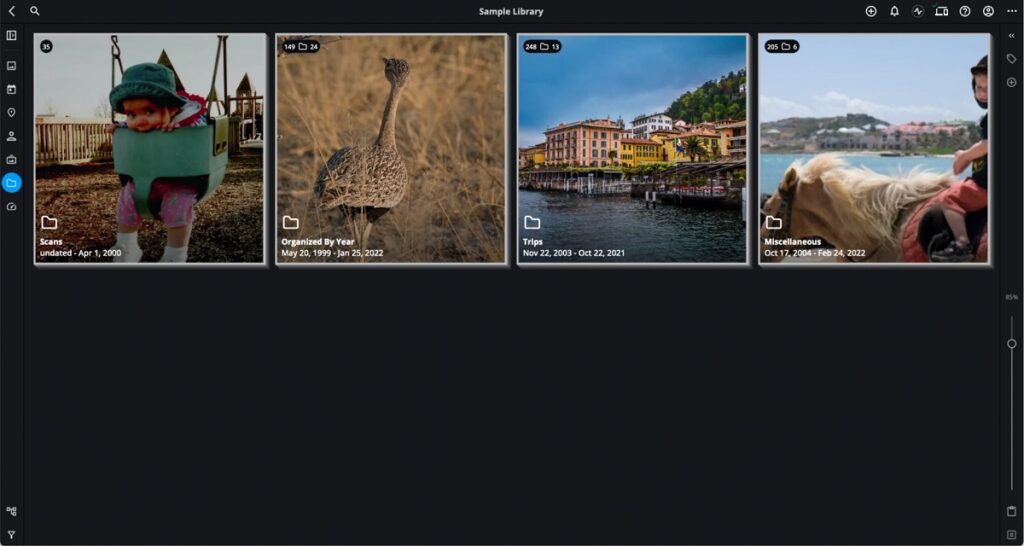
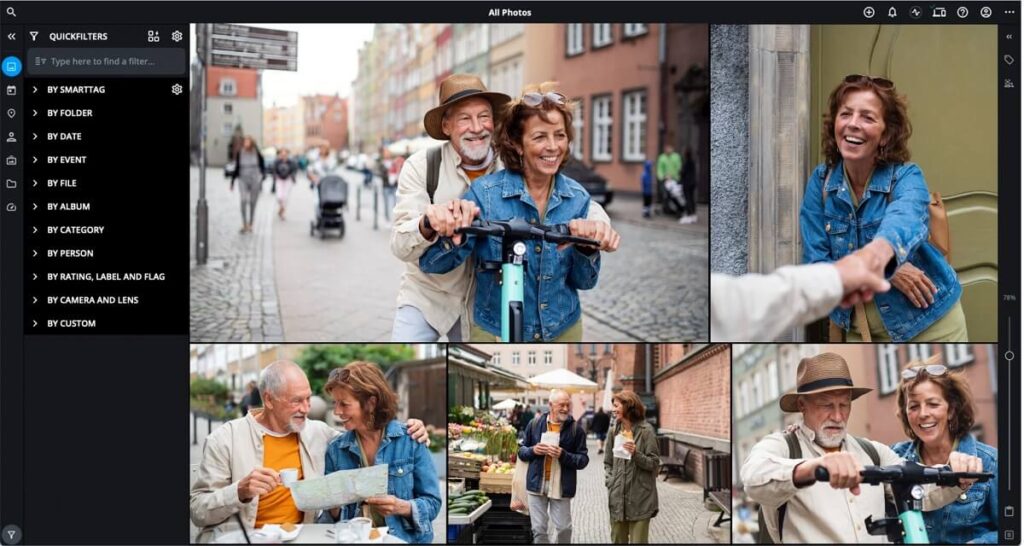
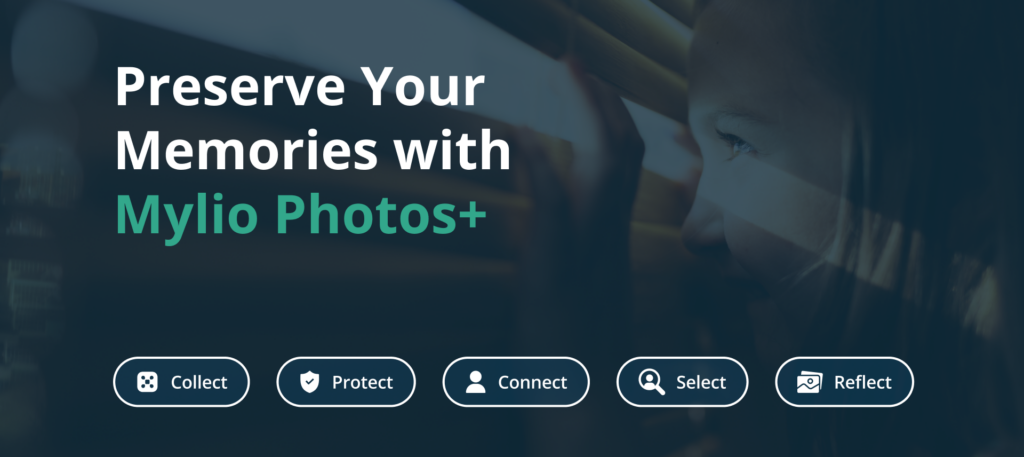
When the restore is finished, disconnect your new iPhone 16 and continue working with your pictures in Mylio Photos – it’s a free app that will help you protect, rediscover, and organize a lifetime of photos, videos, and documents across all your devices.

Done ✅

Congratulations on successfully transferring your photos to your shiny new iPhone 16!

September 10, 2024 0 comment
0 FacebookTwitterPinterestEmail
EducationHow-toPhotographyStories

How to Scan Old Family Photos

by Alex Li July 18, 2024
5 minutes read

Digitizing old family photos can be a fulfilling but challenging task. This article offers practical tips to help you achieve the best results while preserving your precious memories.

Photo Scanning Preparation

Before you start scanning, organize your photos. Gather all your photos and get an extra empty box. Group similar photos together. If your family kept photos in original envelopes with notes like “Florida vacation 1982,” keep these together for context. A DIG YOUR PHOTOS! kit from Sunflower Photo Solutions will give you all the tools and guidelines to organize analog photos faster.  

A DYI photo-scanning project may be time-consuming, but it is fun!

Negatives and old photos require careful handling. Even clean fingers can leave smudges and oils. Wash your hands thoroughly and consider using white gloves at photo supply stores. These gloves protect your photos and negatives from damage.

Setting Up for Scanning

Before scanning, you can sort your photos using their original packaging. Film companies often changed envelope designs, making identifying pictures from different decades easier. Group envelopes with similar designs together to ensure chronological order.

Be selective about what you scan. Scanning every photo can be overwhelming and unnecessary. Start with a few envelopes from the same period. If you have both prints and negatives, prioritize scanning the negatives for better quality. Use prints as references, especially if they have contextual notes on the back.

The Scanning Process

You have several options for scanning your photos. You can use apps like Photomyne or a scanner like the Epson FastFoto. Another option is to work with a full-service scanning company like ScanMyPhotos. If you choose ScanMyPhotos, enter the code “Mylio” at checkout for an additional discount.

Hundreds of Family History Centers managed by FamilySearch.org across the USA offer free photo scanning services. You can also hire a professional photo manager to guide you through the project from start to finish.

Each approach has its pros and cons. While it might be tempting to scan everything yourself, working with a professional photo organizer can help you avoid common mistakes. Even a few hours with a pro can save you days or months of work.

Many professional photo organizers will help you prepare photos for scanning and scan them for you.

If you plan on scanning photos yourself, choose the proper settings. The resolution of your scans, measured in dots per inch (DPI), affects clarity and detail. While 72 DPI is standard for digital displays, it’s inadequate for printing. Aim for at least 200 DPI for prints, with 300 DPI ideal. For enlargements or small prints, scan at 800-900 DPI. Negatives may require up to 3200 DPI for the best results.

Save your scans as TIFF files for archival purposes. TIFF files preserve more detail and color information than JPEGs. You can convert TIFF files to JPEGs later for sharing.

Not every photo needs to be scanned. Skip blurry or less memorable shots. Focus on significant events, family members, and interesting everyday scenes. Remember to scan the backs of photos or envelope covers if they contain essential information.

Post-Scanning Organization

After scanning, rename the files with meaningful names and dates. This makes them easily searchable. Use Mylio Photos to tag your photos with metadata, such as location, dates, face tags, and keywords. Metadata makes your media library easily searchable and more enjoyable.

Tag people, locations, events, and dates to make your photos more searchable. Use consistent naming conventions for easier searching. In the caption field, enter detailed descriptions, including any information from the backs of the photos.

There’s no “one size fits all” approach to naming your folders and albums. Think of something that seems logical and reasonable specifically to you. You can organize photos into folders by family name, event, or decade. For example, create a folder named “Family Johnson” with subfolders like “1940s,” “1950s,” and so on. This setup helps you locate photos and narrow down dates when unsure.

Technical Tips

Understanding DPI and PPI (pixels per inch) helps you achieve the best scan quality. Aim for at least 200 DPI for printing, with 300 DPI ideal. Higher DPI settings ensure better print quality and allow for enlargements without losing detail.

When scanning on your own, consider how you’ll use the images. While high DPI settings produce large files, they’re necessary for quality prints. Use the grayscale setting to reduce file size for black-and-white photos without losing quality.

Always back up your scanned photos on different storage devices or cloud services. This ensures your digital archives remain safe from accidental loss or damage. You can easily automate your backup process with Mylio Photos vaults.

By following these guidelines, you can digitize and preserve your family’s photographic history effectively. Enjoy the process of bringing old memories to life through digital preservation!

July 18, 2024 0 comment
0 FacebookTwitterPinterestEmail
Education

Preserving Privacy: Protecting Your Memories with Mylio Photos+

by Elisa April 5, 2024

By Cathi Nelson

As a passionate advocate for privacy, I’ve witnessed firsthand the importance of protecting our most treasured memories. Our digital footprint has never been more extensive or vulnerable in a world where our lives are increasingly lived online, from social media interactions to e-commerce transactions. Among the most intimate aspects of our digital identity are our photos—snapshots of our lives, encapsulating emotions, experiences, and memories. With the rise of smartphones and cloud storage services, how we store and share these precious moments while protecting our privacy has become more pressing than ever.

For me, privacy isn’t just about keeping secrets; it’s about asserting control over our personal information and deciding who can access it. This control becomes even more crucial when it comes to our photos. Our photo libraries often contain snapshots of our most treasured moments, offering glimpses into our private lives and innermost thoughts. Therefore, how we manage and safeguard our photo collections can have profound implications for our privacy and security.

At the heart of photo privacy lies the need to ensure secure storage. We must shield our images from unauthorized access, data breaches, and exploitation. While cloud storage offers convenience, it also poses risks to our privacy and security. This is where services like Mylio Photos+ provide a secure platform that prioritizes privacy and puts users in control.

Mylio Photos’ decentralized approach to photo management sets it apart from traditional cloud storage services. Instead of relying on centralized servers, Mylio Photos utilizes a peer-to-peer network architecture, allowing users to store their photos locally on their devices or external hard drives. This reduces dependence on third-party servers and minimizes the risk of data breaches and unauthorized access.

Furthermore, Mylio Photos employs end-to-end encryption, ensuring photos remain encrypted in transit and at rest. Even if intercepted, unauthorized parties cannot decipher the contents of the images without the encryption key. As someone deeply invested in privacy advocacy, this commitment to encryption gives me peace of mind, knowing that my photos are shielded from prying eyes and potential security threats.

In addition to secure storage, Mylio Photos offers advanced privacy features such as facial recognition and geotagging controls. These tools empower users to manage their photo metadata, including location data and identifying information, enhancing their privacy and control over their digital assets. By allowing users to customize privacy settings according to their preferences, Mylio Photos ensures that individuals can tailor their photo-sharing experience to align with their privacy concerns.

Regarding sharing photos, Mylio Photos prioritizes direct sharing and peer-to-peer communication over centralized platforms. Mylio Photos ensures that images are shared only with intended recipients by facilitating private sharing through encrypted channels, minimizing the risk of unintended dissemination or misuse of personal data. This approach protects user privacy and fosters trust and intimacy in photo-sharing experiences.

Moreover, I am thrilled to watch hundreds of professional photo managers invest in training and becoming Privacy Advocates. They have passed an online Privacy Advocate Training course, a testament to their commitment to empowering individuals and businesses to safeguard their data and reputation in an ever-evolving digital landscape. Whether you’re a photo manager, business owner, or individual seeking to stay ahead of emerging privacy risks, this course offers valuable insights and practical strategies for protecting sensitive information.

In conclusion, preserving privacy is paramount, especially when managing our photos. Mylio Photos emerges as a beacon of privacy in the crowded landscape of photo management solutions. It offers users a secure and intuitive platform to store, organize, and share their photos while prioritizing confidentiality and control. By embracing Mylio Photos’ decentralized architecture, encryption protocols, and privacy features, individuals can protect their most cherished memories and assert their autonomy in the digital realm.

As we navigate the complexities of the digital landscape, let us remain vigilant in safeguarding our privacy and preserving the sanctity of our digital memories. Together, we can ensure that our data remains just that—personal.

Cathi Nelson is the CEO of The Photo Managers Association, a role in which she channels her passion for preserving memories and facilitating legacy storytelling. With over 30 years of experience in the industry, Cathi has devoted her career to assisting families and businesses in navigating the constantly evolving field of photo management.

April 5, 2024 0 comment
0 FacebookTwitterPinterestEmail
Education

QuickFilters vs Dynamic Search

by Elisa April 5, 2024

When to Use One vs the Other and How to Combine Them for Even Better Results

By Angela Andrieux

Managing and finding the right photos, videos, and documents from a vast collection can be daunting. Mylio Photos simplifies this process with two powerful features: Dynamic Search and QuickFilters. Understanding when to use each feature and how to combine them can drastically improve your ability to find the perfect image or file. Let’s dive into the details of these features and explore different ways you can put them to use.

What is Dynamic Search?

Dynamic Search in Mylio Photos offers a fast and intelligent way to locate specific files within your media collection. As you add and import media into your Mylio Photos Library, the application dynamically indexes your files. This process leverages a high-speed database, ensuring that search results are delivered faster than traditional methods. What sets Dynamic Search apart is its ability to learn from your search habits. Over time, it tailors its indexing to suit the types of data you frequently search for, enhancing the efficiency and speed of future searches.

Dynamic Search is particularly adept at handling various types of data, thanks to features like AI SmartTags, Optical Character Recognition (OCR), Face Detection, and extensive metadata analysis. This comprehensive indexing occurs locally on your device, ensuring your media remains private and secure.

Using Dynamic Search

  • Finding Specific Images or Videos: When you need to locate a particular photo or video based on detailed criteria like activities, objects, or people recognized through AI SmartTags and Face Detection. For example, search for a friend’s name, a place you visited, or for objects like a mountain or dog.
  • Searching Text in Images: Utilizing OCR to find documents or images containing specific text.
  • Advanced Metadata Searches: Looking for media based on detailed camera settings, copyright information, or GPS data.

What are QuickFilters?

QuickFilters in Mylio Photos help you rapidly narrow down your media library based on various criteria. These filters can be applied in any view and can sort through folders, dates, events, file types, albums, people, categories, ratings, and more. QuickFilters are particularly useful for swiftly accessing photos and videos by utilizing metadata and user-added information like tags.

The ability to stack filters further enhances the precision of QuickFilters, and the option to save sets of filters as custom QuickCollections streamlines future searches.

Using QuickFilters

  • Refining Search Results: After using Dynamic Search to find a broad category of images, QuickFilters can narrow down the selection to the exact file you need. Try searching for an object like a Dog or Cat, then narrow the search using QuickFilters > By Year to find your favorite pet from a certain chapter of your life.
  • Organizing and Viewing Collections: Easily grouping media by event, date, person, or other criteria to quickly access related files.
  • Rapid Access to Frequently Used Media: Using saved QuickCollections to access regularly needed images or documents. Try using one of the built-in QuickCollection presets like Awesome Selfies or Sharp Cats to see how it works.

Combining Dynamic Search and QuickFilters for Optimal Results

Mylio Photos allows users to combine Dynamic Search with QuickFilters for the best of both worlds. This approach is ideal for managing large libraries, enabling users to quickly zero in on the desired media.

  1. Start with Dynamic Search: Begin by finding a broad category of media using Dynamic Search’s powerful indexing capabilities. Imagine you’re looking for photos from a specific trip to Paris. You might start with Dynamic Search to locate all images with metadata relating to France.
  2. Refine with QuickFilters: Narrow down the search results by applying QuickFilters based on specific criteria like date, file type, or person. For example, you could apply QuickFilters to select photos taken with a particular camera or lens or during a specific date range within your Paris trip.

Conclusion

Mylio Photos’ Dynamic Search and QuickFilters are indispensable tools for managing and accessing your digital media library. Dynamic Search offers a broad, intelligent search capability that learns from your habits, while QuickFilters provide a means to quickly refine and access your media. By understanding the strengths of each feature and combining them effectively, you can significantly enhance your ability to manage and retrieve media in Mylio Photos, ensuring that the perfect image is always just a few clicks away.

April 5, 2024 0 comment
0 FacebookTwitterPinterestEmail
Education

How to Save Your Family Photo Albums

by Elisa March 22, 2024

By Cathi Nelson

Preserving family memories isn’t merely about safeguarding old photographs; it’s about ensuring that future generations have a profound connection to their roots and heritage. Too often, cherished family albums are discarded mistakenly perceived as insignificant for the future. Yet, these albums serve as invaluable repositories of familial history, offering glimpses into bygone eras and shaping our sense of identity. Here’s why saving old family albums is crucial for the next generation and how to do it effectively:

  1. Store Safely with Archival Protection: Begin by storing your photo albums in archival-safe plastic bags. Shielding them from dust and sunlight preserves their integrity. If your albums already contain photos encased in photo-safe plastic sleeves or adhered to acid-free scrapbook paper, they require no further intervention. However, additional protection from plastic bags is advisable for long-term storage.
  2. Beware of Destructive Albums: Act fast if your photos are encased in so-called magnetic albums. Despite their name, these albums utilize an adhesive coating that wreaks havoc on photographs over time. The acidic glue causes photos to turn yellow and become nearly impossible to extract. Removing your photos from these albums is crucial for their preservation.
  3. Delicately Extract Stuck Photos: Liberating photos from magnetic albums demands patience and precision. Employ dental floss to dislodge them gently, sliding the floss beneath each corner until the adhesive loosens. Stubborn photos may require gentle heat from a hair dryer to soften the glue. Exercise caution to prevent damage during this delicate process.
  4. Document Details for Posterity: As you free photos from their adhesive confines, document pertinent details such as dates and associated information. Index cards or archival pencils facilitate this task, ensuring that each photo is accompanied by its historical context. Additionally, preserve any accompanying documents, such as birth certificates or newspaper clippings, alongside the corresponding photos.
  5. Create Digital Backups: Prioritize digital back ups by scanning your photos before transferring them to new, non-magnetic albums. This preemptive measure safeguards against unforeseen accidents or the gradual deterioration of physical prints. Digital copies afford accessibility and facilitate the creation of shareable digital scrapbooks, fostering intergenerational connectivity.
  6. Display and Share: Select a few favorite photos to adorn frames throughout your home. These images display prominently as conversation starters and focal points of familial pride. Sharing anecdotes and memories associated with these photos reinforces their significance and strengthens familial bonds.

Research Proves Family Photos Builds Self Esteem

Research in psychology has consistently shown that investing in making and sharing happy memories with family has a positive impact. Studies conducted by researchers Marshall Duke and Robyn Fivush at Emory University found that children who knew more of their family’s history had a stronger sense of control over their lives and higher self-esteem than children who did not know these stories. Further, children with the most self-confidence had what the researchers call a strong “intergenerational self,” feeling part of something bigger than themselves.

Children, even grown-up children, can draw on a bank of positive memories and family stories to help cope with more stressful or turbulent times. When families revisit memories with loved ones through photographs, bonds are strengthened, relationships deepen, and memory improves. It is also just plain fun to look back at the way things used to be, as time was passing before you realized it, as the children grew overnight, as traditions were practiced over the years.

By diligently preserving your family’s history today, you ensure that future generations can partake in the joy of unraveling familial mysteries. These photos not only provide glimpses of past trends and hairstyles but also foster a profound connection to our collective heritage and future aspirations. Embrace the responsibility of safeguarding your family’s legacy, for it is a gift to be cherished and shared across generations.

Cathi Nelson is the CEO of The Photo Managers Association, a role in which she channels her passion for preserving memories and facilitating legacy storytelling. With a wealth of experience spanning over 30 years within the industry, Cathi has devoted her career to assisting families and businesses in navigating the constantly evolving of field of photo management.

March 22, 2024 0 comment
0 FacebookTwitterPinterestEmail
Education

Connect By Sharing Photos and Stories

by Elisa February 22, 2024

By Cathi Nelson

We instantly capture moments at the click of a button, sharing them with the world. While this accessibility has its benefits, it has also led to a lack of appreciation for the value of preserving and organizing our photo collections.

Your photo legacy is more than just a collection of pictures; it’s a visual narration of your life, experiences, and the people you hold dear. Let’s explore why your photo legacy matters, tips on ways to share your photos and stories, and how to ensure the technology you use stands the test of time.

This leads me to my personal story of how I turned photos and videos into a memorable video montage. Keep in mind as I share my process that you can do this as well, and rather than creating something as a surprise gift, you can include family members in the process as well.

My Personal Story

When my son got engaged, I decided to surprise him and his fiancée Kate with a video montage of their lives. Here’s how I did it and a photo of their priceless reaction!

Five Steps to Sharing Photos and Stories

Step One: Set a Goal

I knew I had to complete this project before their wedding date, and I started the planning process in January, eight months before the wedding. I needed that time because my photos weren’t organized or scanned yet. I had loved creating scrapbook photo albums for my kids, but those needed to be digitized so everyone could enjoy the photos. TIP: Expect to spend at least 15 – 20 hours on this type of project or you can always hire a professional photo manager to do it for you. Hire a Pro

Step Two: Take Inventory

Next, I had to take stock of all the photos I had taken over the years. I gathered all my physical albums and loose photos and used a spreadsheet to make sure I captured all the details. You can download the forms I used here: Photo Organizing Check Lists. I also rounded up my digital photos from various places like Dropbox, SD Cards, and Apple Photos and moved them into Mylio. Then, I reached out to Kate’s parents for copies of her childhood photos. They were not prolific photographers like I was, so they only sent me 25 to scan. I was concerned with how I could ensure she had equal time in the video, and at her wedding shower, I met her aunt, the family photo historian. She went through decades of photos and sent them to me on a flash drive. TIP: Every family has a photo historian so don’t get discouraged if you don’t have many photos. Ask, and I guarantee someone was taking photos.

Once I had everything in Mylio, I created a timeline for the video. I knew I wanted two songs for Josh, two songs for Kate, and 2 songs for them as a couple. I wanted the slide show to be about 12 minutes and the average amount of time for each photo at about 2 seconds including 2 minutes of video clips. Thus I need 100 photos for each of them from baby to young adult, 100 as a couple, and a number of short clips from videos of growing up.

Step Three: Organize

This was the most time-consuming step. First, I scanned all my albums, ensuring I added the metadata and merged them with my digital photos in Mylio. As you can imagine, I had thousands and thousands of photos to curate.

TIP: To help me create a meaningful video that best demonstrated Josh and Kate’s personalities, I asked both families to send me 4 words that best describe Josh and Kate. Then, I looked for the photos that showcased their personalities. Josh is passionate, mischievous, and competitive. Kate is kind, loves kids and pets, and is silly.

Step Four: Choose the Music

The last step was to choose the music, and here is an important TIP about the music: You can’t use current songs and post the video publicly without the author’s permission. Otherwise, you are violating copyright laws. There are places to find music that is not copyrighted.

Step Five: Put It All Together

The video was a huge hit, everyone laughed and cried. One of the unknown gifts in creating this slide show was getting to know my future daughter-in-law from her childhood photos. I noticed right away that she always made silly faces, and her personality was obvious from the start.

Your photo legacy is more than just a collection of pictures; it’s a reflection of the relationships and values that shape your life. By preserving and sharing these memories, you’re keeping those connections alive for generations.

About Cathi Nelson of The Photo Managers
Cathi Nelson transformed her hobby of organizing photos for family and friends into a full-time business in 2009. Soon, she was helping others learn how to become professional photo organizers, eventually creating an association for photo organizers in 2011. Today, The Photo Managers boasts over 700 members worldwide, ranging from part-timers to those enjoying a second-act career to some six and even seven-figure businesses. The Photo Managers offers courses for hobbyists, a Certification program for professional photo managers, and assistance to companies in creating backups and workflows for their images. Cathi is the author of two books, Photo Organizing Made Easy: Going from Overwhelmed to Overjoyed,and A Business Roadmap for Professional Photo Organizers. Discover more at: https://thephotomanagers.com/

February 22, 2024 0 comment
0 FacebookTwitterPinterestEmail
Education

Choosing an External Hard Drive

by Elisa February 9, 2024

Everything You Need to Know

Selecting the right external hard drive is a crucial step in safeguarding your digital photos. While cloud storage provides accessibility, having a physical hard drive grants you complete control. If you’re delving into photo organizing or handling the task independently, the question arises: which external hard drive suits you best?

There are three primary types: Nonvolatile Memory Express (NVMe) hard drives, Solid State Drives (SSD), and Spinning hard drives. Each serves photo organizing admirably, with no distinct downside or brand superiority.

When it comes to choosing, the determining factor is speed. Let’s explore the options from the slowest to the fastest.

Spinning Hard Drives:

A spinning External Hard Disk Drive (HDD) operates like a portable version of your computer’s internal HDD. Although slower than SSD, it’s cost-effective and offers more storage space. Ideal for those not prioritizing lightning-fast data transfer.

Solid State Drive (SSD) Hard Drives:

Comparable to a high-speed thumb drive, SSDs use memory chips instead of spinning disks. This results in quicker data access and transfer, making them suitable for handling large files like photos and videos. While pricier, they provide a balanced option in terms of speed and cost.

Nonvolatile Memory Express (NVMe) Hard Drives:

NVMe drives, an advanced version of SSDs, boast a rapid NVMe protocol for high-speed communication with a computer’s processor. While pricier and potentially unnecessary for photo storage, they shine when moving large video files swiftly.

Choosing the right external hard drive hinges on your priorities. If cost-efficiency is paramount, a spinning drive may suffice. Opt for an SSD if you seek a balance between speed and cost. Consider an NVMe drive for lightning-fast transfers, especially with substantial video files.

Feeling daunted by the prospect of organizing your photos on a new external hard drive? Fear not – enlist the expertise of a Photo Pro! Our Certified Photo Managers, spanning the globe, offer services to help you organize and preserve your cherished memories. Let the journey to safeguarding your digital legacy begin!

Happy Organizing, Cathi Nelson

February 9, 2024 0 comment
0 FacebookTwitterPinterestEmail
Education

Best Ways to Store Photos Forever

by Dima January 1, 2024

Preserving memories is important, and digital photos have made it easier to keep them for a long time. However, not all storage options are created equal. Here are some of the best ways to store photos, with a focus on reliability, security, and ease of use.

1. Cloud Storage

Cloud storage is becoming increasingly popular as a way to store digital photos. Some of the best options include:

  • Google Drive: provides 15GB of free storage and allows you to upload photos directly from your phone or computer.
  • iCloud: Specifically designed for Apple devices, it offers 5GB of free storage.

One of the main advantages of cloud storage is that you can access your photos from anywhere, as long as you have an internet connection. This makes sharing your photos with friends and family easy and provides extra protection in case your computer or external hard drive fails. However, it is essential to remember that you are entrusting your photos to a third-party service, which means there is always a risk of data breaches or hacking.

Regarding cloud storage, it is important to research your options and choose a provider that meets your needs. Some cloud storage providers offer automatic backup and synchronization across devices, while others require manual uploading and downloading. Some cloud storage providers offer unlimited storage, while others have strict storage limits. It is also essential to consider the security of your photos when using cloud storage. While most cloud storage providers take measures to protect your data, using a strong password and enabling two-factor authentication is recommended.

2. External Hard Drives

Another option for storing digital photos is to use an external hard drive. This physical device connects to your computer and provides additional storage space. Some popular brands include:

  • Seagate
  • Micron

One of the benefits of using an external hard drive is that it allows you to store your photos offline, which means they are not vulnerable to hacking or other digital threats. However, it’s important to note that hard drives can fail over time, so it’s essential to back up your photos regularly and keep the hard drive in a safe place.

When choosing an external hard drive, many factors must be considered. For example, you will need to choose a storage capacity that is appropriate for your needs and a brand and model known for reliability and durability. You may also consider additional features such as password protection and automatic backup software. It is also important to format your external hard drive before using it to ensure it is compatible with your computer and operating system.

Another important consideration when using an external hard drive is the file format of your photos. Some external hard drives use the FAT32 file system, which has a maximum file size of 4GB. If you plan to store high-resolution photos or videos, you may need to use a different file system, such as NTFS or exFAT.

3. Physical Storage Formats

In addition to cloud storage and external hard drives, there are other physical storage formats that you can use to store your photos. These include:

  • CDs and DVDs
    USB drives
    Memory cards

While these formats can be convenient, they also have some drawbacks. For example, they can be easily lost or damaged and become obsolete. They often have limited storage capacity and may require special equipment to access the photos.

If you have an extensive collection of photos, it can be time-consuming and difficult to organize manually. Automatic face recognition software can help simplify the process by identifying the individuals in each picture and automatically tagging them. This makes it easy to find specific photos and create personalized albums.

4. Photo Organizing Software

Automatic face recognition software is an AI technology that uses algorithms to identify and recognize faces in photos. Mylio Photos is an example of such software offering advanced face detection and tagging capabilities. With features like automatic geotagging and calendar views, Mylio Photos makes organizing and simplifying photo management easy. Additionally, it provides a secure and private way to store your cherished memories in one place.

This technology can organize photos by identifying the individuals in each picture. Once the software has identified faces, it can automatically tag each person in the photo to make finding pictures easier. Regardless of your storage option, it is important to regularly back up your photos to prevent data loss in case of a hardware failure or other disasters. In addition to backing up your digital photos, you may also want to consider creating physical prints of your favorite photos as a backup option. Printed photos can last for generations and provide a tangible way to preserve memories.

5. Online Backup Services

Online backup services are one of the most effective ways to safeguard your photos. With online backup, all your photos and files are automatically saved to a remote server, which means you can access them anytime and anywhere. This storage method is particularly helpful if you’re worried about losing your pictures because of theft, accidents, or natural disasters.

Some popular online backup services include Backblaze and Carbonite, which offer plenty of storage space, security features, and affordable pricing plans. However, before you choose an online backup service, it’s essential to research and compare different options to find the one that suits your needs the best. Consider storage space, pricing, security features, and customer reviews.

Mylio Photos is an advanced photo manager that uses AI technology to identify and recognize faces and objects in your photos. Still, it also provides one of the best backup services available. With Mylio Photos, you can store your photos securely and privately on your devices without an internet connection. Mylio Photos offers automatic face recognition, allowing you to easily organize your photos by identifying the individuals in each picture and automatically tagging them. Additionally, Mylio Photos provides advanced object recognition capabilities that can help you quickly find specific photos based on the objects within them. With features like automatic geotagging and calendar views, Mylio Photos makes it easy to simplify photo management and back up your cherished memories in one place.

The best way to store and organize digital & printed photos

Preserving your memories is vital; you can do so effectively by selecting the right storage option. With so many options available, each with advantages and disadvantages, choosing based on your needs and preferences is important. Whether you store your photos on cloud storage, external hard drives, physical storage formats, or online backup services, it’s crucial to ensure that your photos are backed up regularly to avoid data loss.

In addition to backing up digital photos, it’s also a good idea to create physical prints of your favorite photos as a backup option. Printed photos are tangible and can last for generations, making them an excellent way to preserve memories. Remember that preserving your memories is essential, and by selecting the right storage option, you can protect your photos from damage or loss.

The key to selecting the right storage option is considering factors such as storage capacity, device compatibility, security features, and ease of use. By considering these factors, you can ensure that your cherished memories are preserved for years.

If you want a reliable and secure way to store your digital photos, consider using Mylio Photos. With its advanced face and object recognition capabilities, Mylio Photos makes it easy to organize and manage your photos while providing a secure and private way to store them on your devices. Whether you’re using cloud storage, external hard drives, or physical storage formats, Mylio Photos can help simplify the process and ensure that your photos are backed up regularly to avoid data loss.

In addition, it is worth noting that different storage options can have different implications for the quality and fidelity of your photos. For example, when using cloud storage, it’s essential to consider the compression and encoding of your photos, as this can affect their resolution and overall quality. Similarly, when using physical storage formats like CDs or DVDs, it’s essential to consider the longevity and durability of the media, as well as the compatibility with different devices and players.

Another factor to consider when choosing a storage option for your photos is the level of accessibility and sharing that you require. While cloud storage and online backup services provide convenient access and sharing options, they can also be subject to network connectivity issues, data caps, and other limitations. On the other hand, physical storage formats like USB drives or external hard drives may offer more reliable and flexible access but may not be as easy to share or collaborate on with others.


Ultimately, the choice of storage option for your photos will depend on various factors, including your specific needs and preferences and the technical and practical considerations of the different options available. By taking the time to research and evaluate your options and by regularly backing up your photos, you can ensure that your cherished memories are preserved and protected for years to come.

FAQ

What is the best way to store videos?

The same way as for photos. Cloud storage, external hard drives, and physical storage formats are all viable options.

What are the best ways to store photos from a phone (iPhone or Android)?

Cloud storage is the easiest and most convenient way to store photos from your phone. Google Drive and iCloud are great options, allowing you to upload photos directly from your phone.

What are the best ways to store photos on Windows or Mac?

The best way to store photos on Windows or Mac is to combine cloud and physical storage. This will ensure that you have multiple copies of your photos in case one storage option fails.

What is the best way to store thousands of photos?

Mylio Photos is an excellent option for storing and organizing thousands of photos. Its advanced face recognition technology and automatic geotagging make finding and organizing your photos easy, no matter how many you have.

January 1, 2024 0 comment
0 FacebookTwitterPinterestEmail
Education

What to do with old family, friends and school photos

by Dima January 1, 2024

As we age, we often accumulate boxes of old photos, photo albums, and other images that we don’t know what to do with. These pictures are often memories of our loved ones, our childhood, and important events in our lives. However, as time goes on, these photos can become disorganized, damaged, or lost. In this article, we will discuss what to do with old photos and how to organize and maintain them using software, as well as some other ideas for how to use and display your old photos.

Creative Things to Do with Old Pictures

1. Create a Photo Book

One great way to display your old photos is by creating a photo book. Many online services offer photo book creation, allowing you to design and customize your own book with your favorite photos. You can also include captions and other text to accompany your photos. This is a great way to preserve your memories and create a physical keepsake. You can create a photo book for a specific event, such as a wedding or a vacation, or for a specific person, such as a family member

Creating a photo book is ideal for those who want a physical keepsake of their memories. The ability to customize the book and include captions and other text makes it a personal and unique keepsake.

Key features:

  • Customizable photo book with captions and text
  • Online services available for creating photo books
  • Ability to create a photo book for a specific event or person

2. Make a Collage

Another fun way to use your old photos is by creating a collage. You can use software to arrange your photos into a collage that you can then print and display in your home. You can also add text or other design elements to your collage to make it more personalized. This is a great way to showcase your memories in a creative way. You can create a collage for a specific event or person, or for a specific wall in your home.

Creating a collage is ideal for those who want a creative way to showcase their memories. The ability to add text and other design elements makes it a personalized and unique way to display your photos.

Key features:

  • Software available for creating collages
  • Ability to add text and other design elements
  • Ability to create a collage for a specific event, person, or wall in your home

3. Create a Digital Slideshow

If you have a lot of photos that you want to display, you can create a digital slideshow. There are many software options available that allow you to create a slideshow with music and special effects. You can also add captions or other text to your slideshow to provide context for your photos. This is a great way to share your memories with others in a dynamic and engaging way. You can create a slideshow for a specific event or person, or for a specific audience, such as a group of friends or family members.

Creating a digital slideshow is ideal for those who want to share their memories in a dynamic and engaging way. The ability to add music and special effects, and include captions and other text makes it a unique and personalized way to share your photos.

Key features:

  • Software available for creating digital slideshows
  • Ability to add music and special effects
  • Captions and other text
  • Ability to create a slideshow for a specific event, person, or audience

4. Share with Family and Friends

Finally, one of the best things you can do with your old photos is share them with your family and friends. You can use software to create an online album that you can share with your loved ones, or you can print copies of your photos and give them as gifts. Sharing your photos with others can help preserve your memories and ensure that they are passed down to future generations. This is a great way to connect with your loved ones and share your stories. You can share your photos with a specific group of people or with a wider audience, such as on social media.

Sharing your photos with others is ideal for those who want to connect with their loved ones and share their memories. The ability to create an online album or print copies of your photos makes it easy to share your photos with others.

Key features:

  • Software available for creating online albums
  • Ability to print copies of photos
  • Ability to share your photos with a specific group of people or with a wider audience

5. Use Photo Organizing Software

Organizing old photos can seem like a daunting task, but with the help of photo organization software, it can be made much easier. Here are some of the most popular software options available:

Mylio Photos

Mylio Photos is a powerful photo organizing and sharing app that is designed to keep your photos in sync across all your devices. You can store your photos in the cloud, on your computer, and on your mobile devices. One of the best features is its ability to automatically organize your photos based on the time and location they were taken. This app also has a batch photo sharing option, which makes it easy to share lots of photos with just a few clicks.

One of the advantages of using Mylio Photos is that it allows you to create custom albums and tags, which makes it easier to find specific photos. Additionally, you can edit your photos within the app and even create slideshows and collages. Mylio Photos also has a feature called “Sync,” which allows you to sync your photos across multiple devices.

Mylio Photos is a great option for those who have a large collection of photos and want to keep them organized and accessible across multiple devices. The automatic organization feature makes it easy to find specific photos and the batch photo sharing option is ideal for sharing photos with friends and family.

Key features:

  • Automatic organization of photos based on time and location
  • Batch photo-sharing option
  • Ability to store photos in the cloud, on your computer, and on your mobile devices
  • Custom albums and tags
  • Editing tools for photos
  • Sync feature to sync photos across multiple devices

Google Photos

Google Photos is another popular photo organization software option. It offers unlimited free storage for photos and videos, as long as you don’t mind the compression of the files. Google Photos also has powerful search capabilities that allow you to find specific photos based on people, places, and things. Additionally, this app has editing tools that allow you to enhance your photos.

One of the benefits of Google Photos is that it allows you to create and share albums with your friends and family. You can also add captions and locations to your photos, which makes it easier to remember the details of your memories. Google Photos also has a feature called “Assistant,” which automatically creates collages, animations, and movies from your photos.

Google Photos is a great option for those who want unlimited storage for their photos and videos. The powerful search capabilities make it easy to find specific photos and the ability to create and share albums is ideal for sharing photos with friends and family.

Key features:

  • Unlimited free storage for photos and videos
  • Powerful search capabilities
  • Editing tools for enhancing photos
  • Ability to create and share albums
  • Captions and locations
  • Assistant feature to automatically create collages, animations, and movies

Apple Photos

Apple Photos is the photo organization software that comes pre-installed on all Apple devices. It offers a range of editing tools that allow you to enhance your photos, as well as features that allow you to create photo albums and share your photos with others. Apple Photos also has a Memories feature that automatically creates slideshows and collages based on your photos.

One of the benefits of using Apple Photos is that it allows you to create shared albums that your friends and family can contribute to. This is a great way to collaborate on photo albums and share memories with each other. Apple Photos also has a feature called “Live Photos,” which captures a few seconds of video and audio before and after you take a photo.

Apple Photos is a great option for those who use Apple devices and want to keep their photos organized and easily accessible. The editing tools are powerful and the Memories feature is great for creating slideshows and collages. The ability to create shared albums is also ideal for sharing photos with friends and family.

Key features:

  • Pre-installed on all Apple devices
  • Editing tools for enhancing photos
  • Memories feature for creating slideshows and collages
  • Shared albums
  • Live Photos feature to capture a few seconds of video and audio before and after you take a photo

What to do with old family photos no one wants?

In conclusion, there are many things you can do with your old photos, from creating a photo book to sharing them with your family and friends. Using software to organize and maintain your photos, you can ensure that they are preserved for years. While Mylio Photos, Google Photos, and Apple Photos are excellent options for photo organization, many other software options are available, so be sure to compare and contrast them to find the best one for your needs. Remember, your old photos are precious memories that deserve to be preserved and cherished.

FAQ

What to do with old family photos no one wants?

Save it to the archive (cloud or physical hard drive). Maybe sometimes it will be needed for someone from your family.

What to do with old duplicate photos?

Use a duplicate removing software. For example – https://manual.mylio.com/22/en/topic/finding-and-removing-duplicate-media

What to do with old photos after scanning?

Save and organize it. You can save it into cloud or to the hard drive. To organize and manage these photos you need to use a software, for example Mylio.

How to enhance old digital photos with low resolution?

You can use special Photo Enlargement Software, but anyway you should save original files because all modern image enlargers are not perfect yet and, maybe in 5-10 years you will be able to enlarge your photos with better quality.

January 1, 2024 0 comment
0 FacebookTwitterPinterestEmail
Education

White Balance in Photography – Definition and Examples

by Dima January 1, 2024

The purpose of a photographic camera is to transform the three-dimensional reality in front of the lens into an accurate two-dimensional picture. But the result depends on the quality of the available light. And while shutter speed, aperture, and ISO deal with the light’s intensity, white balance deals with the color of the light. 

Therefore, if you want photographs with natural-looking colors, you need to understand white balance and start setting up the camera by adjusting the white balance according to the available lighting conditions. The following guide will explain in detail what white balance is, how to adjust it, and when to rely on automatic settings and when not.

What Is White Balance?

White balance is a camera setting that establishes what filtering the camera has to do in order to represent white objects as white areas in the photograph. It is essentially a calibration process that ensures high color accuracy by eliminating the color casts induced by light. By establishing a reference color point (white), all the other colors will be correctly represented. As a result, your photos will look realistic and have natural-looking colors.

You need white balance because the light is not always white. It may have another color. For example, natural light is closer to orange during the golden hours, closer to blue on overcast days, and closer to white on sunny days at noon. Artificial light may also have different colors based on its source (e.g., fluorescent bulbs, LED panels, candles, household bulbs with warm or cool light, etc.). 

The color of light is called color temperature and is measured in Kelvin (K). Understanding white balance starts with understanding color temperature because when the light is warm or cold, the camera has to compensate to create a correct representation of colors.

Color Temperature

Color temperature is a physical property of light. It is called color temperature because it represents the spectrum of light radiated by a black surface with a particular temperature. Surfaces with high temperatures radiate cool colors in the spectrum of blue and violet. Surfaces with low temperatures radiate warm colors in the spectrum of orange and red.

Wikipedia: Approximation of the hues of the Planckian locus as a function of the Kelvin temperature, rendered with a white point near 6500 K.

Professional Photo Color Correction

For photography and white balance in particular you need to know that perfectly white light has a color temperature of 6500K. Daylight on a sunny day has a neutral color and around 5000K color temperature. This type of light doesn’t create a color cast. That’s why flash units have a color temperature of approximate 5500K; they try to replicate daylight.

Light during the golden hours, household bulbs with warm light, and candlelight are warm and have a lower color temperature (3000-4000K golden hours, 2500-3500K household bulbs with warm light, 1000-2000K candlelight). They produce an orange color cast.

Photo by Petr Vyšohlíd on Unsplash

Daylight on overcast days and household bulbs with cool light have a higher color temperature (6000-10000K). They produce a blue color cast.

White balance should consider the color temperature of the available light to be able to remove its color cast and produce accurate colors.

When to Set Up White Balance Manually

Setting up white balance manually, like setting up any other camera setting, ensures you get exactly what you want and eliminates possible camera errors. You evaluate the color temperature of the available light and tell the camera what to do. That’s no room for mistakes.

One way to go is to set the white balance correctly to eliminate any color cast and produce photographs with high color accuracy. Another way to go is intentionally allow or even emphasize a color cast and create an artistic effect by setting a slightly erroneous white balance. For example, you may want to add a warm color cast to enhance autumn foliage or a subtle blue color cast to convey the cold of a winter day. In these situations, you tell the camera that the available light’s color temperature is colder or warmer than it actually is to enforce color compensation.

Correct photograph versus slightly golden version due to an intentional off-white balance.

Professional cameras have a Custom White Balance setting that allows you to photograph a neutral white surface in the same lighting conditions you have during the photo shoot and use it as a reference white point. You need a neutral white card or a white surface in your photograph space for this setup.

Another way to set up white balance manually is to give the camera the color temperature of the available light. The camera will compensate with its opposite color temperature. Remember, daylight has a color temperature of around 5000K. Anything less than that means warm light, and the camera will compensate by increasing the amount of blue. Anything higher than that means blue light, and the camera will compensate by increasing the amount of orange.

However, if the lighting conditions change during the photo shoot, you must redo the white balance setup. Studio photographers usually set up white balance manually for each photo session because they control the lighting design, and the scenery doesn’t change (e.g., product and commercial photography, headshots and portraits, fashion and beauty photography, etc.). But outside the studio, it may take too much time and effort to set up white balance whenever the lighting conditions change, which makes many photographers use white balance presets instead.

White Balance Presets

White balance presets are predefined settings that speed up the white balance setup process. Most cameras offer white balance presets for the most common lighting situations, such as Daylight (5600K), Cloudy(6000K), Fluorescent(4000K), Flash(5500K), Incandescent(3200K), and Shade(7000K).

In order, Incandescent, Fluorescent, Cloudy, Shade

Some cameras also allow you to create custom presets for other lighting situations you frequently encounter. Check out your camera’s manual, and don’t waste time if you have predefined white balance settings you can use.

When to Use Auto White Balance

Auto white balance means letting the camera decide the color temperature of the available light and compensate it accordingly. It’s fast and helpful when you move from one lighting scenario to another within the same photo shoot. For example, if you move from photographing subjects in full sunlight to photographing subjects in the shadows, you don’t have time to manually adjust the white balance each time you move the camera.

However, auto-white balance isn’t always precise, which means it may overcompensate for particular color casts. For example, if your scene includes many warm colors (e.g., autumn foliage, a field of orange flowers, etc.), the camera may use a white balance for low temperatures and create a cold, bluish landscape. On the contrary, if your scene includes cold colors (e.g., a blue evening sky), the camera may use a white balance for high temperatures and create yellow buildings or people.

The camera uses the entire scene to determine the color temperature and set the white balance. But if your scenery has high contrast between warm and cold colors, the camera will average them. The result may not be flattering for either of the image’s parts.

Auto white balance versus manual white balance

So, use auto white balance when the scene has good lighting, is mostly natural, and has no mixed color temperatures. In more complicated situations, make the decision yourself.

Adjusting White Balance in Post-Processing

We all want to achieve the perfect photographs in-camera, but it’s not always possible. The truth is most of our photos require post-processing. We shoot in RAW to ensure the camera records the tiniest details, leaving us room for editing. Although JPEG files take less card space and allow us to take more photos, they record only essential data. In this case, adjusting the white balance in post-processing is more difficult and affects image quality.

Regardless of your photo editor, you have multiple ways to adjust the white balance. For example, Lightroom offers white balance presets that resemble the ones in your camera and allow for quick fixes. Other photo editors, such as Mylio’s built-in photo tool, feature an Auto White Balance adjustment that fixes the white balance for you. However, like with the in-camera auto white balance setting, automatic and semi-automatic adjustments don’t necessarily represent your vision but the algorithms’. So, if you want precision and color accuracy, you should adjust the white balance manually.

The result of using the Auto White Balance tool

The easiest way to adjust the white balance in post-processing is to use a dedicated tool that allows you to reduce the orange or blue color cast using sliders. Usually, the tool also provides a Picker or Eye-Dropper that lets you select a pixel you know should be white. The editor then uses the reference white pixel to adjust the colors in the entire image.

White Balance tool

Other post-processing tools for fixing white balance are Color Balance (allows you to change the color balance between cyan and red, magenta and green, and yellow and blue for highlights, midtones, and shadows) and Levels and Curves (allows you to adjust levels of red, green, and blue). Even a color filter that compensates for your photo’s color cast can be used to fix white balance. Just make sure you don’t overdo it. Remember, the goal is to achieve natural-looking colors.

The result of using the Curves tool

The excellent news about photo editing is that you can adjust the white balance only for a particular image area. For example, suppose you used in-camera auto white balance, and the image has bluish tones where it isn’t supposed to. In that case, you can separate the affected area and compensate for the blue color cast (e.g., retouch people’s skin tones in a photograph taken at sunset).

Conclusion

White balance is an essential setting that can make or break a photograph. Although post-processing corrections are possible, don’t rely on editing. Analyze the three characteristics of light – direction, intensity, and color – and set up the camera accordingly. When you don’t have time for manual settings, use the automatic features or available presets to speed up the workflow. Nonetheless, remain in control and press the shutter release button only when all settings are correctly set up.

FAQ

What is ISO?

ISO is a camera setting that sets the camera’s sensitivity to light. The name stands for International Organization for Standardization, which defined the standard for analog photography in 1988.
Initially, ISO represented the film’s sensitivity to light, a property of the film. Digital sensors, however, can have more than one ISO value. At high ISO values, the sensor becomes more sensitive to light and thus creates brighter images. Most modern digital cameras provide an ISO range between 100 and 25600.

What is the correct white balance? 

The correct white balance is the white balance that allows the camera to represent white objects as being white and, therefore, produce a realistic representation of the scenery. The correct white balance depends on the color temperature of the available light at the moment of shooting.

Why is adjusting the white balance important?

White balance is essential for color accuracy. Without a correct white balance, the subject of your photographs may look artificial (e.g., blue skin tones, yellow teeth, green food, etc.) or not resemble the original. When photo accuracy is essential, such as in portrait, nature, and product photography, the first setting the photographer needs to do is white balance.

How do I know if my white balance is off?

If you use a digital camera, photograph and look at it on its LCD screen. Your white balance is off if you notice a yellow or blue tint. Even at the small scale of the camera’s screen, the image should look exactly like the scenery in front of you.

January 1, 2024 0 comment
0 FacebookTwitterPinterestEmail
  • 1
  • 2
  • 3

Recent Posts

  • Time Travels. Memories Stay.

    March 26, 2025
  • New Mylio Plans – a note from the Mylio CEO

    March 4, 2025
  • The Two New Mylio Plans for Seamless Family and Team Collaboration

    February 27, 2025
  • Bridging the Distance: How Military Families Stay Connected Through Photos

    February 1, 2025
  • The Cross-Platform Family Photo Crisis.

    December 10, 2024

Categories

  • collaboration (1)
  • Education (28)
  • Featured (33)
  • How-to (31)
  • Photography (6)
  • Reviews (10)
  • Sneak Peek (4)
  • Stories (20)
  • Trending (16)

Mylio Blog

Get Mylio Now Mylio Support Mylio Community Mylio Support Forum

Features

Photo organizer for iPhone Photo organizer for Mac Video organizer Photo enhancer Family photo sharing app Automatic face recognition Duplicate photo finder

Reviews

Best photo organizing software for mac Best photo organizing software Photo scanning service Free photography webinars Best photo sharing apps Best cameras for families

Guides

Family photography guide Family photoshoot outfits What to do with old family photos Shapes in photography Best way to store photos forever White balance photography

How-to

How to enhance a photo How to organize 30 years of photos How to organize photos

© Copyright 2023 Mylio.