
Printing your photos is one of the most rewarding ways to enjoy your photography. A well-made print transforms a digital image into something tangible—something to frame, gift, display, or preserve for future generations. But if you’ve ever been disappointed by a print that looked dull, blurry, or oddly cropped, you know there’s more to printing than simply sending a file to a lab.
In this guide, you’ll learn how to prepare photos for printing so they look their best—whether you’re printing at home or through a professional lab. We’ll cover three key steps:
- Edit for print-ready color, brightness, and composition
- Check and adjust your image resolution
- Export with the right file settings
Follow these tips, and you’ll be able to produce sharp, vibrant prints you’ll be proud to display.
Prefer to Watch? Here’s the Video Guide
1. Edit Your Photos for Print
Digital screens and printed photos display images very differently. Screens are backlit and often brighter than reality, which can make prints appear darker or less vibrant than expected. Before sending a photo to print, take time to make these key adjustments.
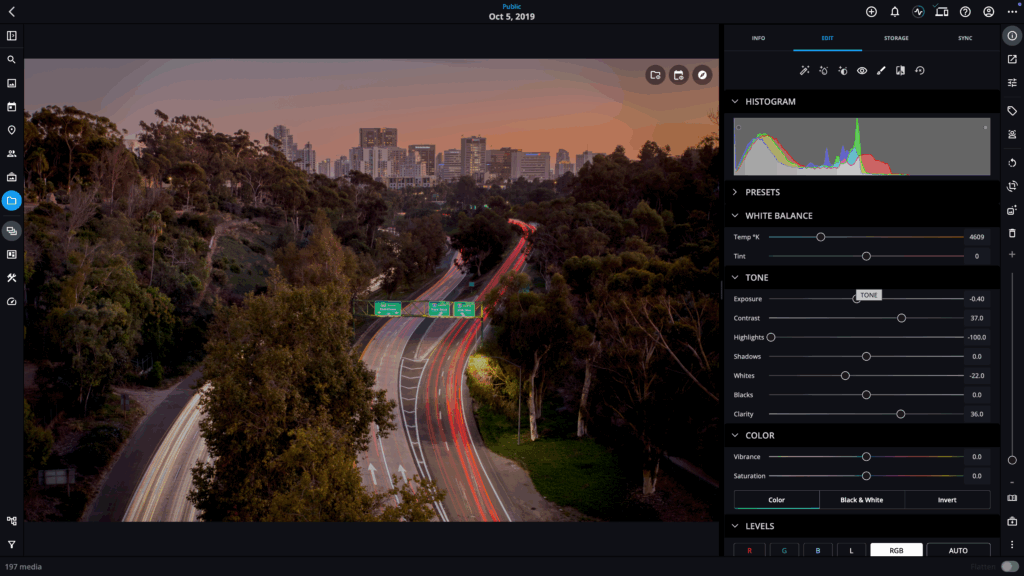
Brightness and Contrast
- Brighten slightly to compensate for the lack of backlighting in prints.
- Adjust contrast so your photo has depth and detail without looking harsh.
Sharpening
- If you shoot JPEG or HEIC, your camera may apply some sharpening automatically.
- If you shoot RAW, add gentle sharpening in post-processing to enhance fine detail.
Color and White Balance
- Ensure colors look natural, or make creative choices that suit your vision.
- Correct white balance to remove unwanted color casts (too blue, too yellow, etc.).
Cropping and Composition
- Crop to improve composition and eliminate distractions.
- Straighten horizons for landscapes or seascapes.
- Choose a standard print aspect ratio (e.g., 4×6, 8×10, square) to avoid unexpected cropping by the printer.

PRO TIP: Non-Destructive Editing in Mylio Photos
When you edit in Mylio Photos, changes are stored in an industry-standard XMP sidecar file, meaning your original image remains untouched and you can revert at any time.
2. Check Your Resolution Before Printing
Resolution determines how much detail your print will have. It’s usually measured in PPI (pixels per inch). The higher the PPI, the sharper the print – up to a point.
Recommended PPI for Prints
- 300 PPI – Professional quality prints
- 240 PPI – Excellent for most home prints
- 150 PPI – Acceptable for very large prints viewed from a distance
How to Calculate Printable Size
Divide the number of pixels on the long edge of your image by your desired PPI to get the maximum print size.
Example: 3,600 pixels ÷ 300 PPI = 12 inches.
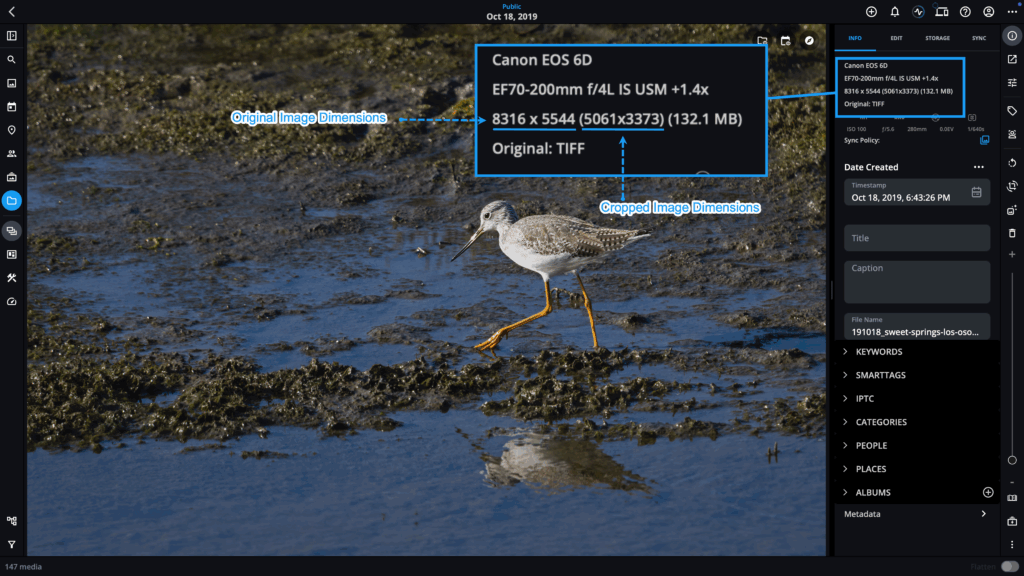
Consider Viewing Distance
Large prints (20×30 inches and beyond) are viewed from farther away, so lower PPI can still look excellent.
Upscaling Low-Resolution Images
If your photo doesn’t have enough pixels for the size you want, use AI-powered tools such as Topaz Photo AI, Luminar Neo, or ON1 Resize to increase resolution and recover detail.
3. Export With the Right File Settings
Export settings control the format, color, and quality of the file you send to a printer.
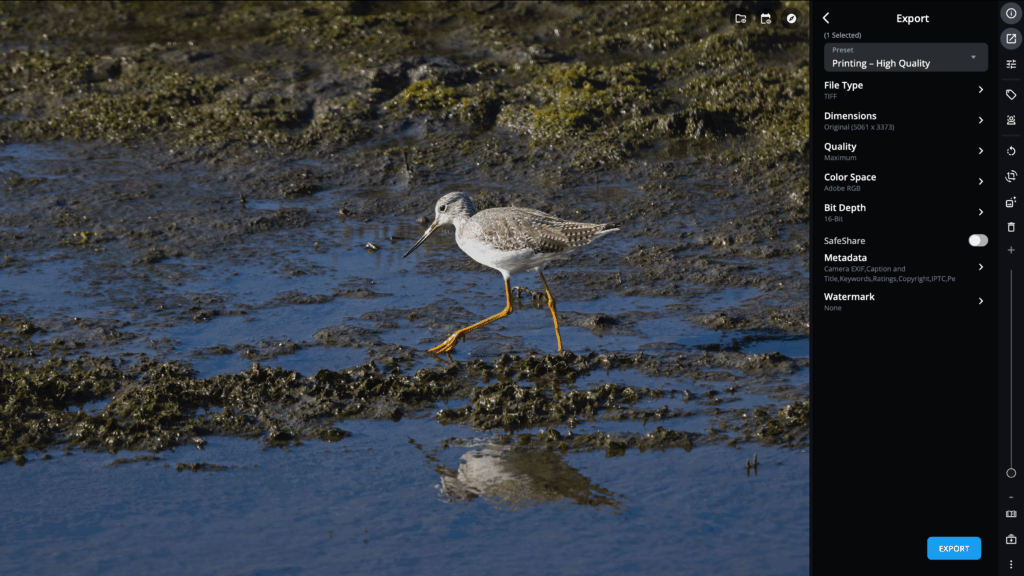
File Format
- TIFF – Best for professional labs; lossless and high-quality
- JPEG – Widely accepted; choose maximum quality settings
Color Space
- sRGB – Most common and accepted by all labs
- Adobe RGB – Use only if your printer or lab specifically requests it
Bit Depth
- 16-bit – For TIFF files to retain maximum tonal detail
- 8-bit – Standard for JPEGs
Metadata and Watermarks
- Most printers don’t need metadata; it’s optional to include.
- Avoid watermarks unless they’re part of your artistic intent. Many photographers sign prints by hand instead.
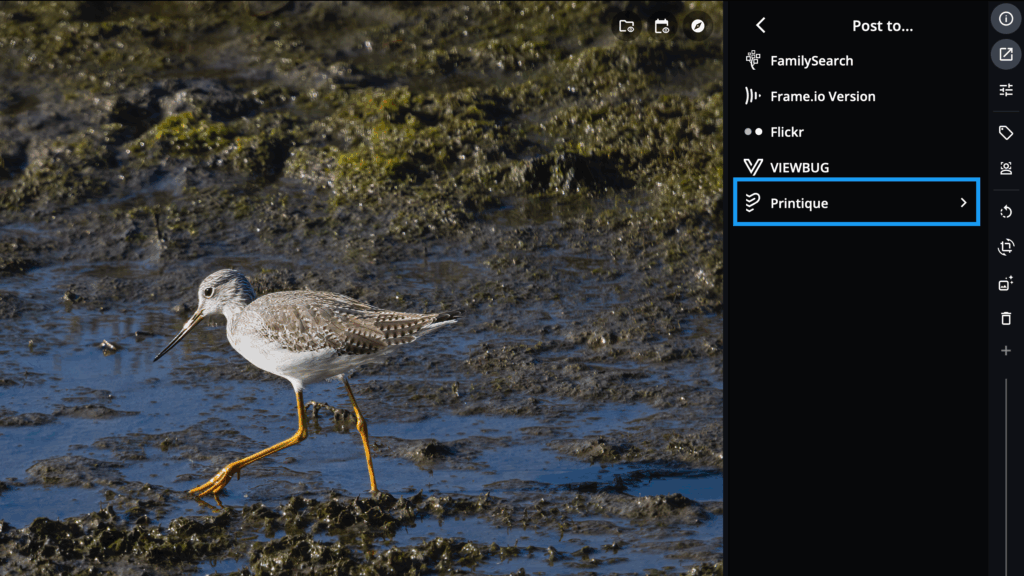
Printing Directly From Mylio Photos
Mylio Photos integrates with Printique for a simple, streamlined process—no manual export required. For other labs or home printing, use Mylio’s Export function and select the Printing High-Quality preset.
Quick Printing Checklist
Before you send your photo to print, confirm you have:
- ✅ Straightened horizons and cropped to a standard aspect ratio
- ✅ Adjusted brightness, contrast, sharpening, and color for print
- ✅ Verified resolution for your intended print size
- ✅ Exported a high-qaulity file in the correct file format, color space, and bit depth
Why Printing Matters
Digital photos are convenient, but prints give your memories a lasting physical presence. They’re easy to enjoy without a screen, and they make meaningful gifts and heirlooms. Whether you display them on your walls or in albums, prints invite you to connect with the moments you’ve captured.
By following these steps, you’ll know how to prepare photos for printing so they look as stunning in your hands as they do on your screen.
Want to learn more? Explore Mylio Photos’ editing, organizing, and export tools to streamline your entire photo-to-print workflow.