
Every photo tells a story, but without knowing where it was taken, part of that story can get lost. Whether you’re organizing family history scans, DSLR images, or decades of digital pictures, adding GPS location data helps you connect each photo to its place in the world.
With Mylio Photos, it’s easy to add GPS data to photos and put your memories on the map. Even if your photos don’t include built-in location information, you can add or correct it in just a few clicks. Here’s how to find missing data, tag locations, and make your photo collection truly searchable and complete.
Prefer to Watch, Instead of Read?
Step 1: Find Photos Missing GPS Data in Mylio Photos
Before you can tag locations, it helps to see which photos don’t have them. Mylio Photos makes that simple.
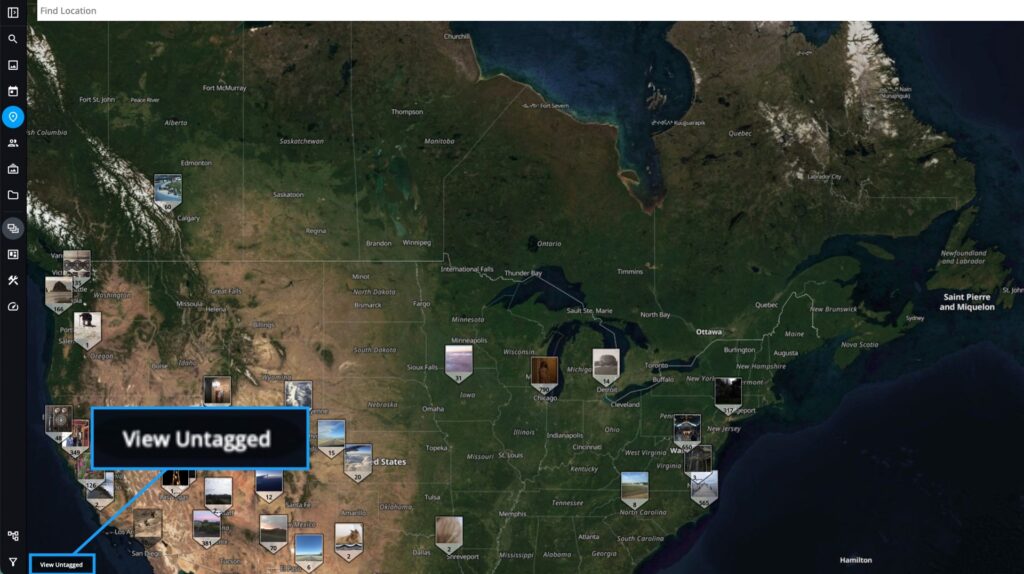
- Open the Map View.
- Click the Untagged button in the bottom-left corner of the screen.
This filters your library to show only photos missing GPS information. You’ll quickly spot images taken with cameras that don’t embed location data, like DSLRs, mirrorless cameras, or scanned photos. Once you’ve found them, it’s time to give each one a place on the map.
PRO TIP: Scanned family photos often have no metadata at all. Adding at least a city, state, or landmark brings valuable historical context to your family archives.
Step 2: Add or Correct Location Information (How to Add GPS Data to Photos)
Mylio Photos gives you flexible ways to add GPS coordinates and bring context back to your images. Whether you’re geotagging scanned prints or updating camera photos, these methods make it fast and accurate.
Drag and Drop Onto the Map
The easiest way to tag a photo (or a group of photos):
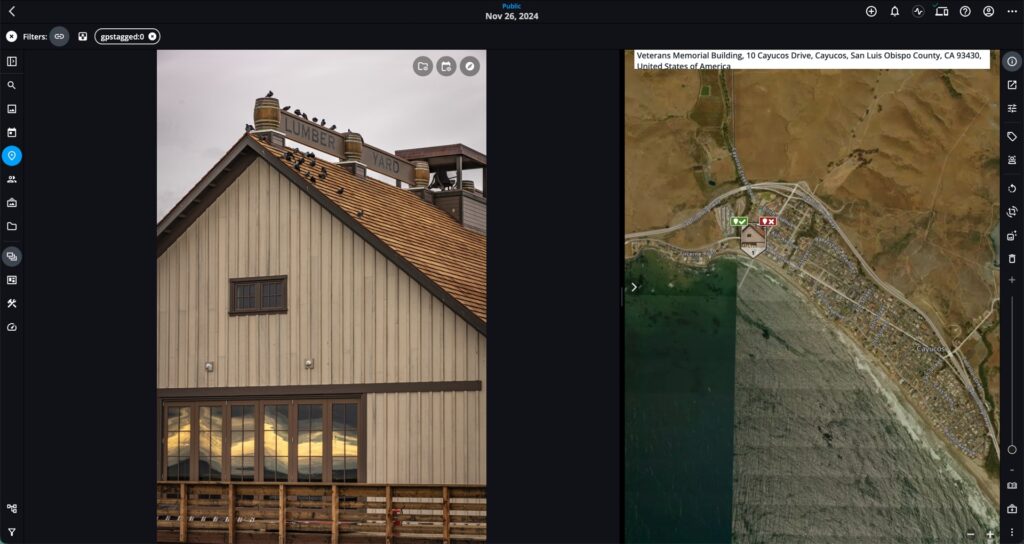
- Open the Info Panel.
- Expand the Places section.
- Search or zoom to a location on the map.
- Drag your photo(s) onto that spot and click the checkmark to confirm.
A small map pin appears, showing your photo now has GPS coordinates.
Right-Click to Drop a Pin
If you’re editing one photo in Single Image View, right-click directly on the map to drop a pin. This method gives you fine control over the exact location.
Copy and Paste Coordinates
When you have both smartphone and camera photos from the same trip, copy GPS data from one and paste it into the other’s GPS field. This ensures consistent location information across all your images.
Type a General Location
Don’t know the exact spot? Type in a city or landmark. Adding general location info now saves time later, and you can always fine-tune your pins.
Step 3: Batch Tag Photos to Add GPS Data Fast
If you have a whole folder of photos from one event or destination, you can tag them all at once.
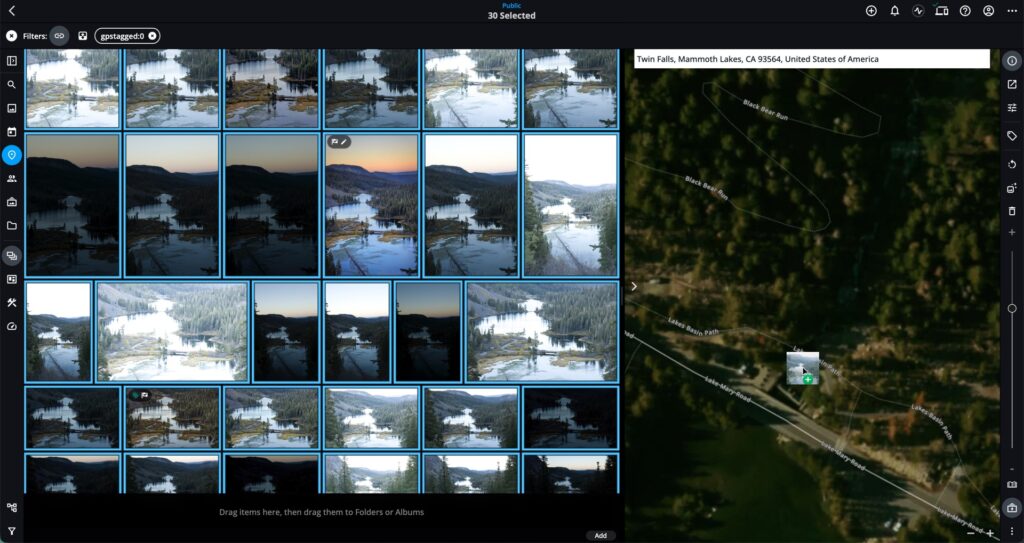
- Select multiple images (or press Command/Control + A to select all).
- In the Info Panel, go to Places.
- Search or zoom to the correct area on the map.
- Drag the group of photos onto that location and confirm.
Mylio Photos instantly applies GPS coordinates to every selected image. Even if you’re only adding a general location, it makes your photos searchable and viewable by place, and you can refine details later.
Explore and Relive Your Adventures
Once your photos are tagged, Mylio Photos lets you explore your collection in a whole new way:
- See every place you’ve photographed on the interactive Map View.
- Open Library Stats → Places to visualize where you shoot most often.
- Use Photo Explorer to open any photo’s location in Google Maps, Apple Maps, Bing, or OpenStreetMap.
These tools help you rediscover forgotten moments, trace travel routes, or plan your next trip inspired by the places you’ve already captured.
Keep Every Memory on the Map
When you take the time to add GPS location data to your photos, they gain a new layer of meaning. You’ll never again wonder, “Where was that taken?” — instead, you’ll be able to travel back to that exact place with a click.
With Mylio Photos, putting every memory on the map is easy. Start by finding untagged photos, add location details with drag-and-drop tools, and batch-tag entire folders to save time. Because every photo deserves its place in the story, and on the map.